Moving data from S3 to Snowflake to satisfy use cases around analysis, corporate reporting, or cross-domain information collaboration is best achieved through Snowpipe.
Snowpipe is an event-based data ingestion tool that comes together with Snowflake. Snowpipe has two main methods to trigger a data loading process.
- Cloud Storage Event Notifications (AWS S3, GCP CS, Azure Blob)
- Snowpipe’s REST API
This article will focus on option one. The data loading will be triggered when new data files land in AWS S3. The image below shows how both methods work.

Setting up AWS and Snowflake
Set up the connection between AWS and Snowflake.
Prepare an S3 bucket, configure permission for the bucket, and create an IAM role.
Then create a storage integration in Snowflake.
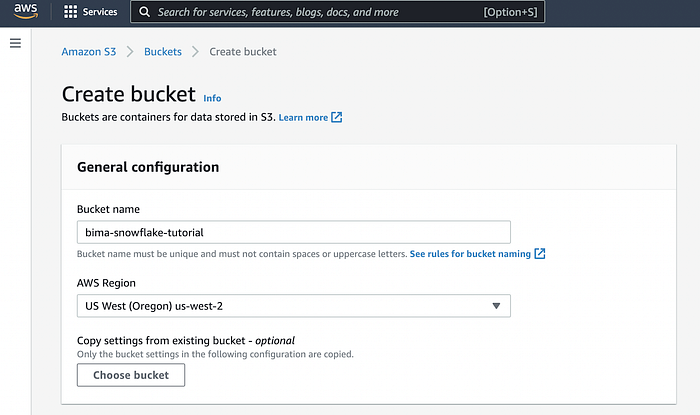
Step 1 Creating an S3 bucket
We will create a new bucket for this scenario. We need to go to the Amazon S3 service and create a new bucket there.
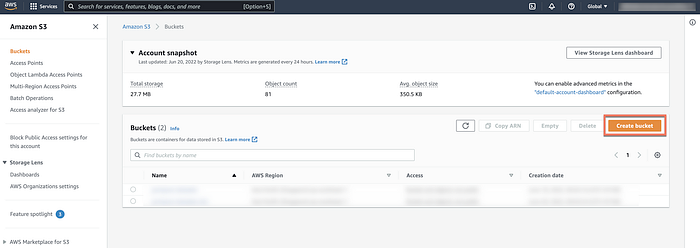
For a demo can use default settings.
Step 2 Configuring access permission for S3 bucket
Set up an IAM policy that will be used for the S3 bucket.
Snowflake requires the following permission to access files in the S3 bucket:
- s3:GetBucketLocation
- s3:GetObject
- s3:GetObjectVersion
- s3:ListBucket
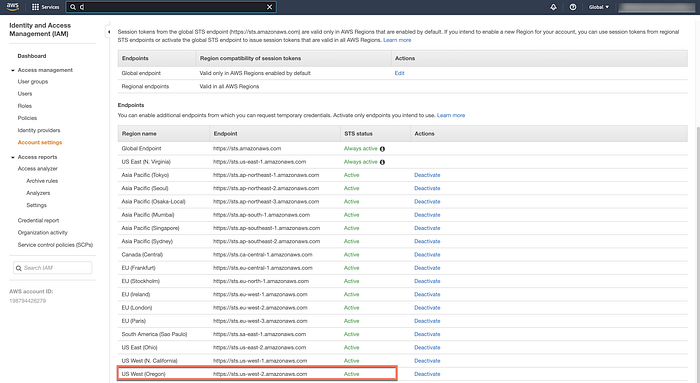
Before creating the permission, we need to ensure that the Security Token Service in the account settings is active for the region we used. To do that, go to the IAM service and move to the Account settings section.
Then, to create a new policy, we need to navigate to the policy page and click Create policy.
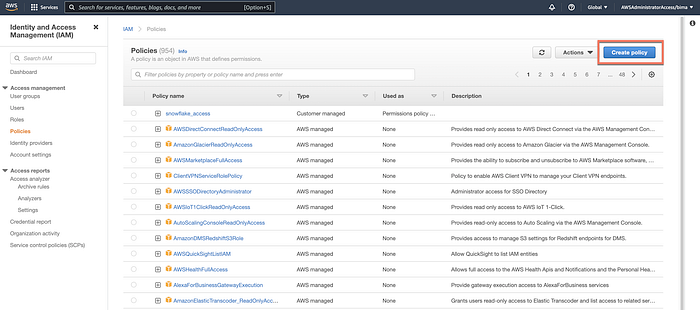
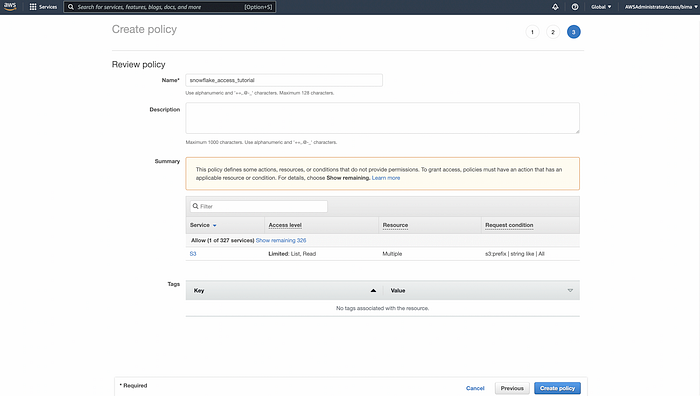
Fill the JSON policy, add the policy name and click Create policy.

Can use the snowflake_access_tutorial as the policy name.
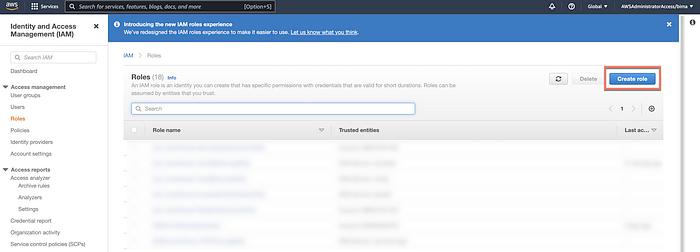
Step 3 Create an IAM role
This new IAM role will be tied to the IAM policy we created in Step 2. Then we will use this IAM for the snowflake storage integration.
Go to the Roles section to create a new IAM role.
Select AWS account → Another AWS account as the account type. Then put your AWS ID as an account id. Also, enable the required external ID and put 0000 for now.

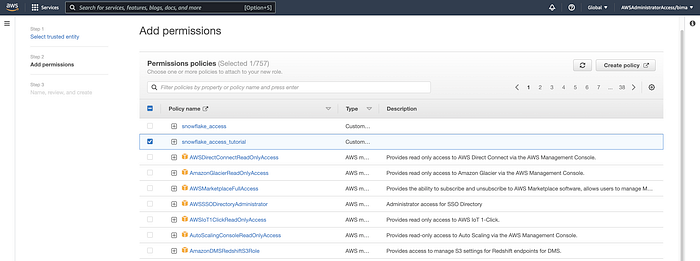
The next step is selecting the permission policy. Can choosesnowflake_access_tutorial for permission.
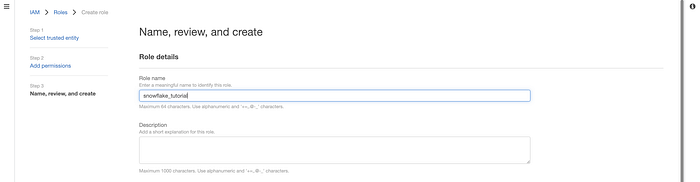
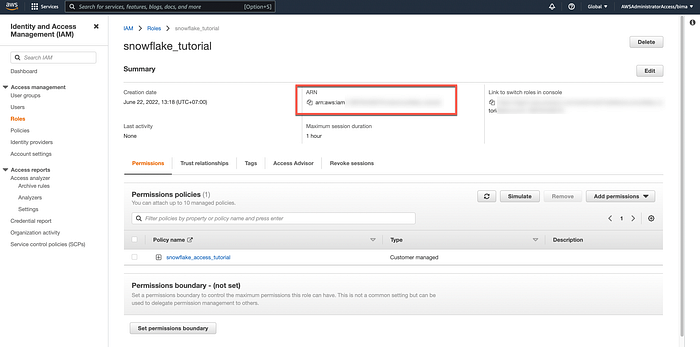
Put the name on the role. Can use snowflake_tutorial as the role name.
Once creating the role, record and copy the ARN values in the summary section.
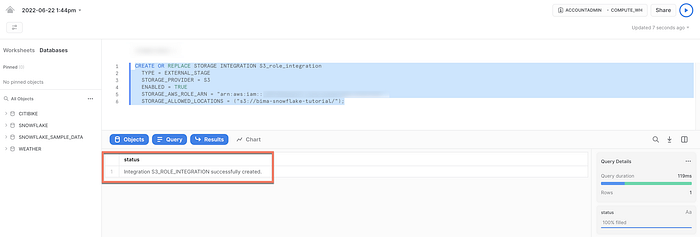
Step 4 Create storage integration
Configure the connection between S3 and Snowflake. Create an external storage integration to link the IAM role and Snowflake.
We can run the following code in the snowflake worksheet to do that.
Can change the STORAGE_AWS_ROLE_ARN with the recorded ARN in the previous step. Then fill the STORAGE_ALLOWED_LOCATIONS with the storage bucket URL.
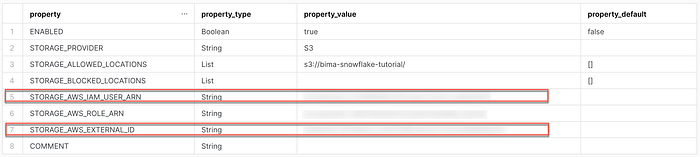
Run this command to check the integration detail and take a note on:
- STORAGE_AWS_IAM_USE_ARN
- STORAGE_AWS_EXTERNAL_ID
desc integration S3_role_integration;
Step 5 Configure IAM Role Trust relationship
This step requires us to get back to the AWS IAM Role section. Go to snowflake_tutorial roles. Then on the Trust relationship tab, click edit trust relationship and edit the file with the recorded STORAGE_AWS_IAM_USE_ARN and STORAGE_AWS_EXTERNAL_ID.
Setup for S3 and Snowflake is complete. Now start creating a pipe and automatically bring data from S3 to Snowflake when new data comes into S3.
Creating a Snowpipe
Let’s begin by creating a new database, table, and stage for our landing zone. We can run the following codes in the Worksheet to do that:
Create a database
create or replace database S3_db;
Create a table
create or replace table S3_table(files string);
Create a stage
use schema S3_db.public; create or replace stage S3_stage
url = ('s3://bima-snowflake-tutorial/')
storage_integration = S3_role_integration;
Then we can create a pipe with the code below:
Create a pipe
create or replace pipe S3_db.public.S3_pipe auto_ingest=true as
copy into S3_db.public.S3_table
from @S3_db.public.S3_stage;
This code means we are creating a pipe with the name S3_pipe and enabling auto_ingest, which will ingest the data automatically once it lands in the S3. The pipe will copy the file in the S3 to the S3_table in Snowflake.
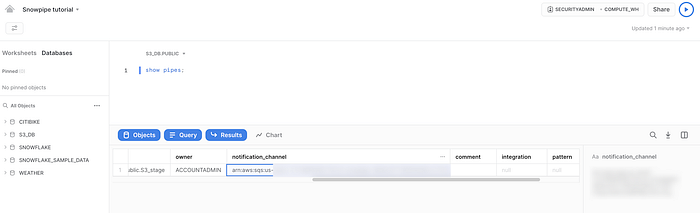
The next step is to record the notification channel ARN for this pipe and add it to the S3 bucket event notification.
Run this code to get the notification channel ARN
show pipes;
Get into the AWS S3 service console and select the bucket. Now, go to the Properties tab and create an event notification.

Fill the setup with the following values:
Event Info:
- Name: Auto-ingest Snowflake
Event Types
- Events: All objects create events
Destination
- Send to: SQS Queue
- SQS: Add SQS queue ARN
- SQS queue ARN: Fill your notification channel ARN here
====